
To scan document to your email from a Canon MFD, please follow the instructions below.
-
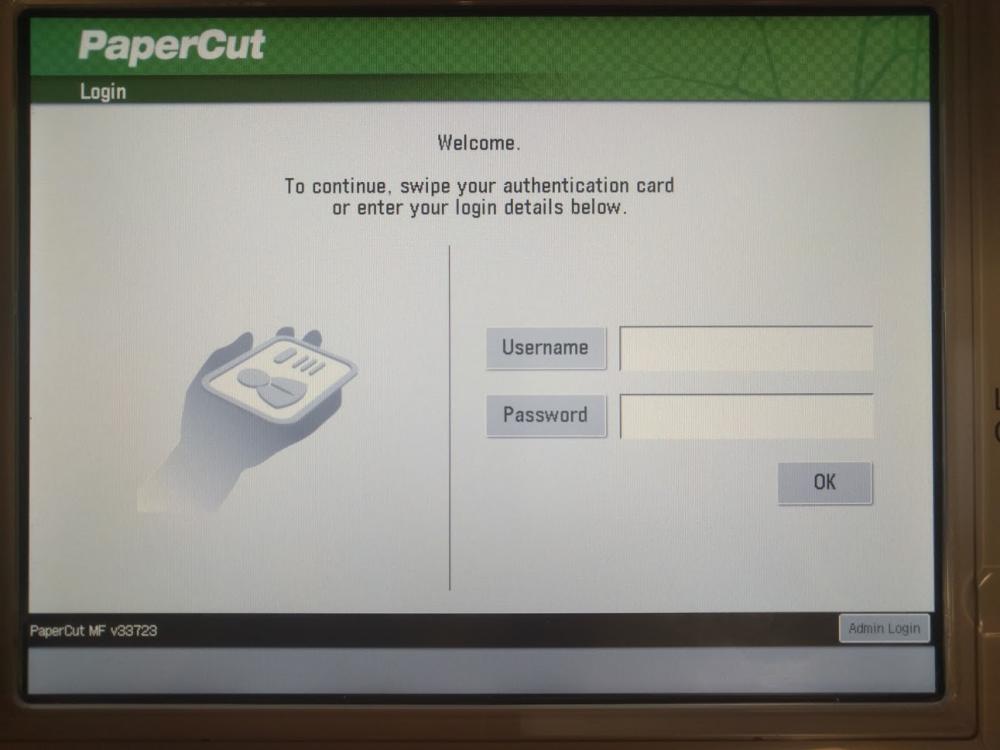
Log in with your North Central college username and password through the touch screen or swipe your ID card on the device.
-
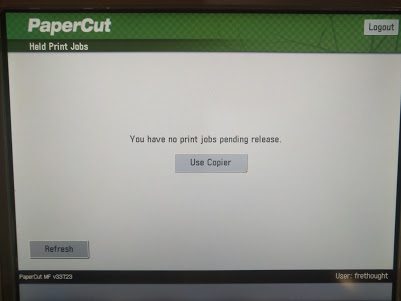
Select Use Copier
- At the Account Confirmation screen, press Next to continue or Log Out to change accounts
-
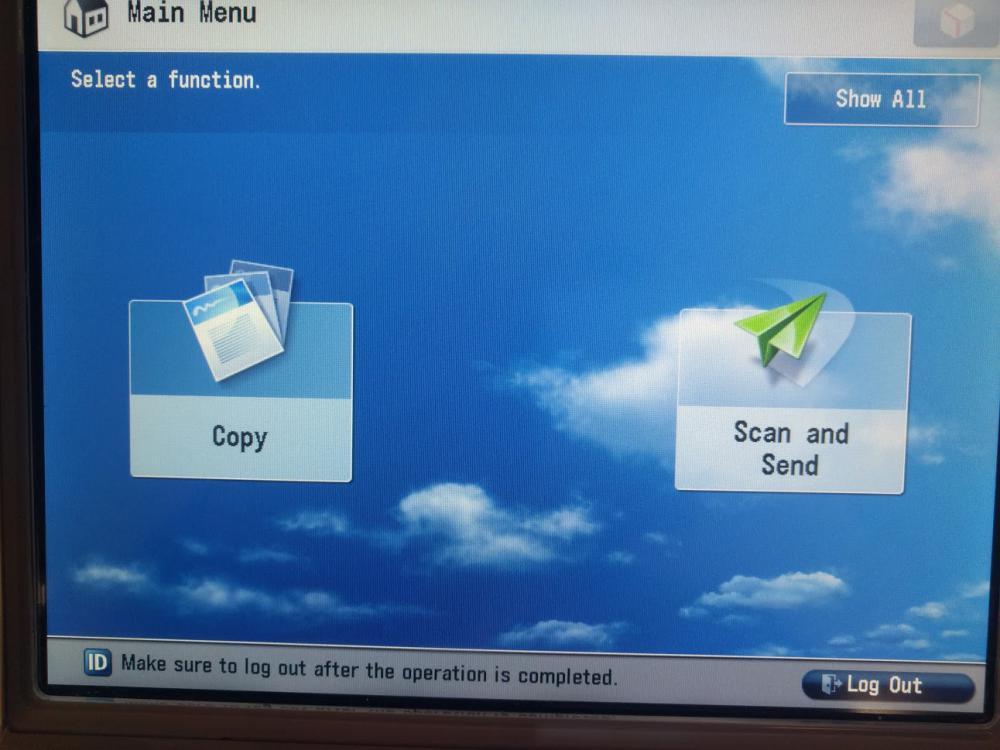
On the Main Menu screen, Select Scan and Send
-
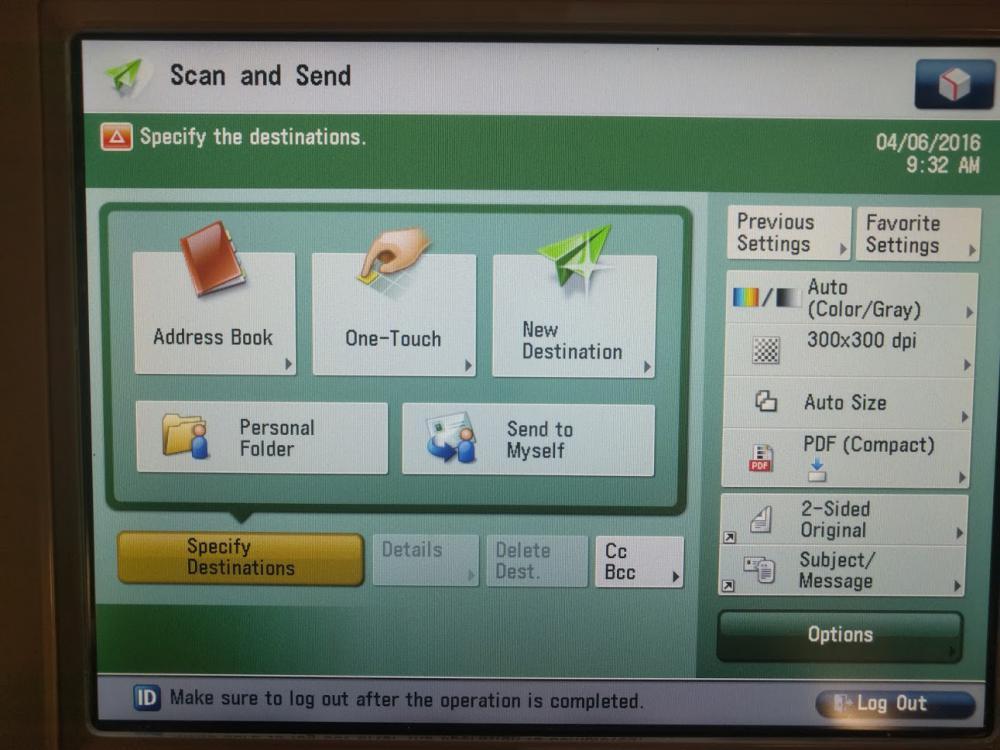
On the Scan and Send Menu, press Send to Myself to send the document to the email of the account that is currently logged in. You can send the document to multiple email address or a different email by selecting Address Book
-
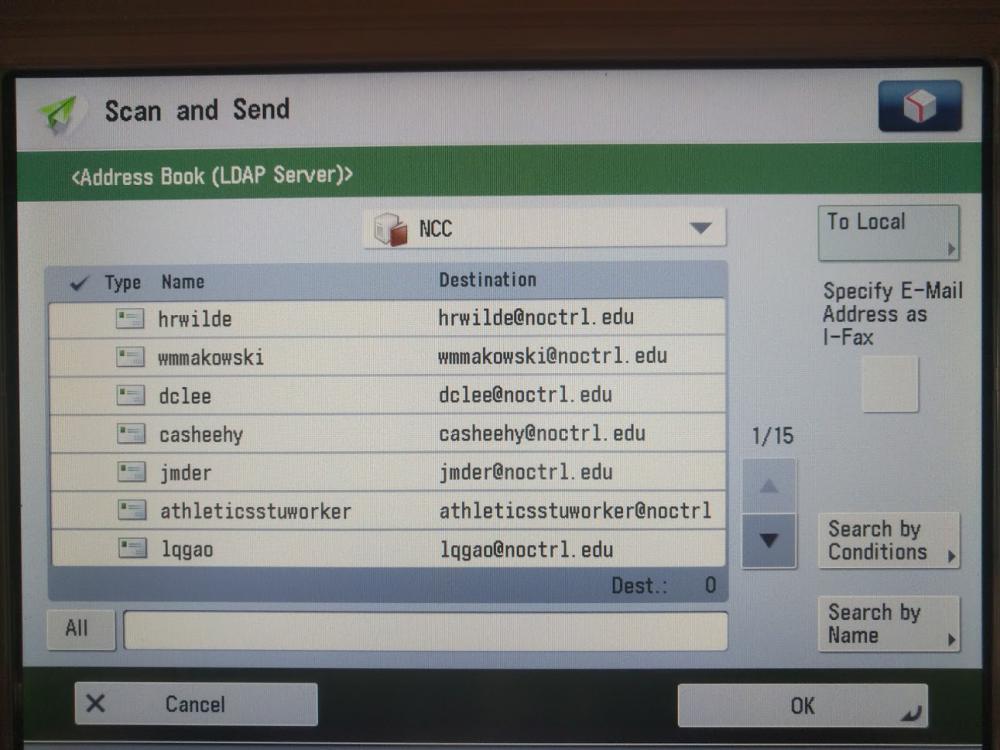
Within the Address Book, select To LDAP Server and press OK to the message that appears.

-
Select Search by Conditions in the lower right corner
- NOTE: The following steps can be repeated to add more email addresses
-
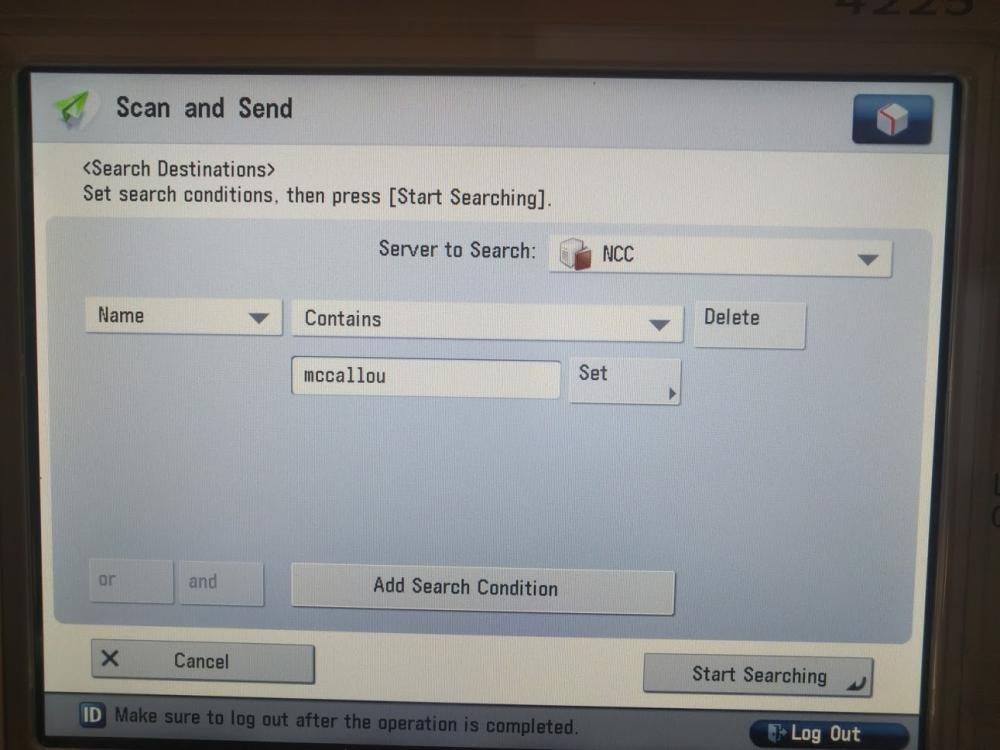
You can search for email addresses on campus by selecting the Name and Contains options. This will allow you to search for email addresses without typing in the entire address. Select Start Searching to begin the search.
-
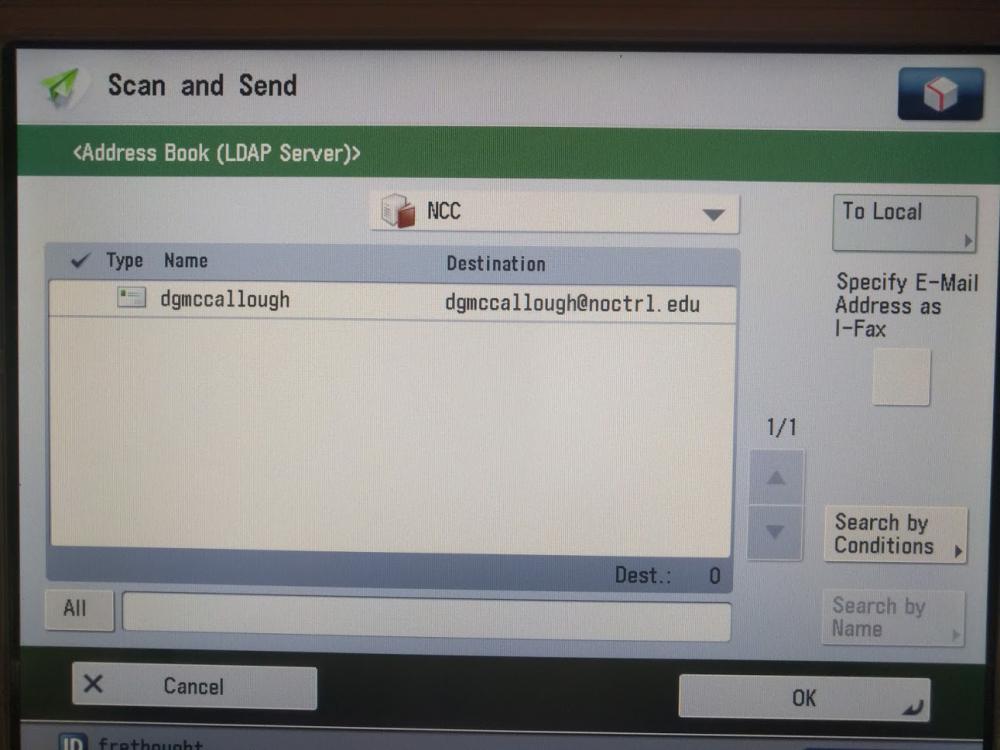
Select the email address that you would like to add from the list that appears. (Multiple email addresses can be selected from this screen) Click OK
-
The following screen will displays a confirmation of all email addresses that were selected.

- Once you are finished adding email addresses, press the physical green "Start" button on the printer to begin the scan and send process.
- You will then be prompted to log in to 'SMTP Server'. Your username should already be filled in but you will need to select the password box to type your password. You can press the Store Password option and you will no longer be prompted for your password until you have to change it. Once you press the OK button, your document will begin scanning.