
The Outlook Web App (OWA) lets you access your Office 365 mailbox using a web browser from any computer that has an Internet connection. This page contains information on how to use OWA to read and send email messages, organize contacts, create tasks, and manage your calendar. This page also provides information on how to use OWA to manage global settings for your Office 365 account, such as email forwarding, automatic replies (vacation messages), and inbox rules (email filters).
Accessing the Outlook Web App for Office 365
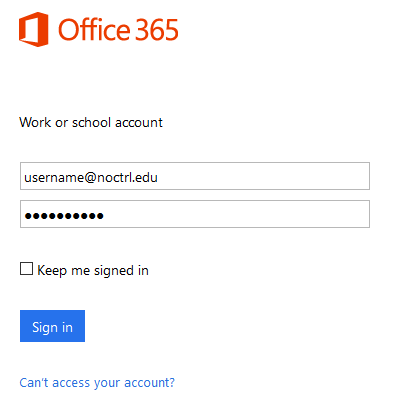
The Outlook Web App (OWA) is the web-based email client for Office 365. You can access OWA from any supported web browser by following the steps below:
-
Navigate to https://outlook.office.com
-
Sign in using your NCC email address and your NCC password. Click Sign in.
-
During your first login, you will be prompted to select your preferred display language and time zone. Once complete, click Save.

-
Your NCC mailbox/calendar/contacts should now be viewable on screen.
- When you are finished using the Outlook Web App, please remember to logout. You should also exit your web browser by closing all open tabs to ensure you have properly signed out of your Office 365 account.
Problems logging in?
Please make sure you are using the correct username and password and try a different browser . If you are still unable to login, please contact the ITS Help Desk at (630) 637-5440.
Navigating Outlook
After you have successfully logged into your NCC Office 365 account, your NCC Outlook account will open. From here, you will be alerted of any pending notifications, able to access your mail and other features of O365 such as calendaring, contact management, task management and more.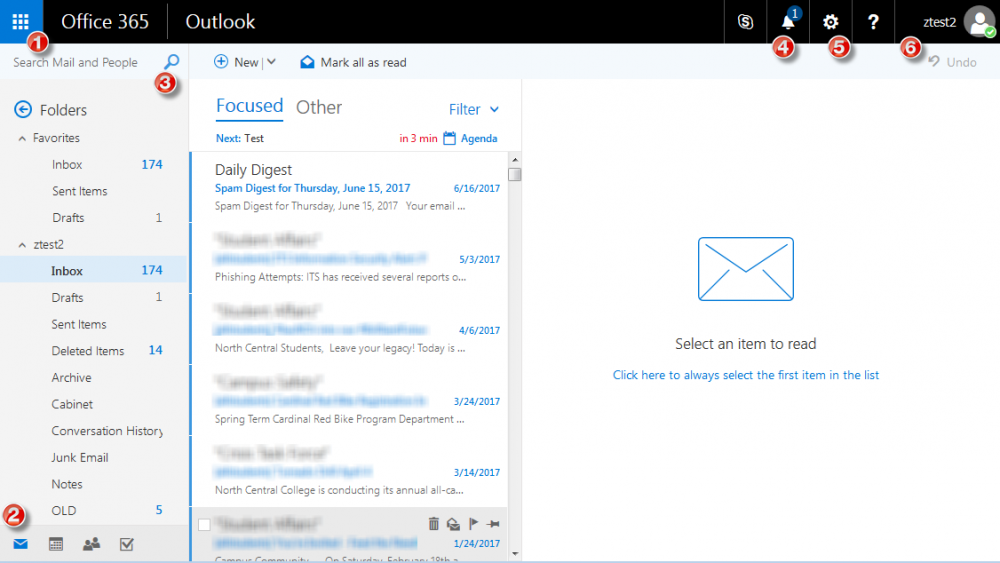
-
O365: Access and navigate between other features of O365 such as Calendars, Planner, People, Teams, Stream and much more.
-
Quick Access: Quickly switch between the most commonly used Outlook features such as Mail, Calendar, People/Contacts and Tasks.
-
Search: Easily search for messages or contacts using the built-in search feature
-
Notifications: Get alerted to items that need your attention. The number located above the bell indicates the number of notifications pending.
-
Settings: Create automatic replies, configure offline settings, change your theme and customize a variety of mail, calendar and contact settings.
-
My Accounts: View account settings and log out of your O365 account.
Additional Resources:
Additional information about using mail features of your NCC Microsoft Office 365 account can be found on Microsoft's website.
Getting Started with Outlook Web App
By default after logging into Outlook Web App, you will be brought straight to your Inbox.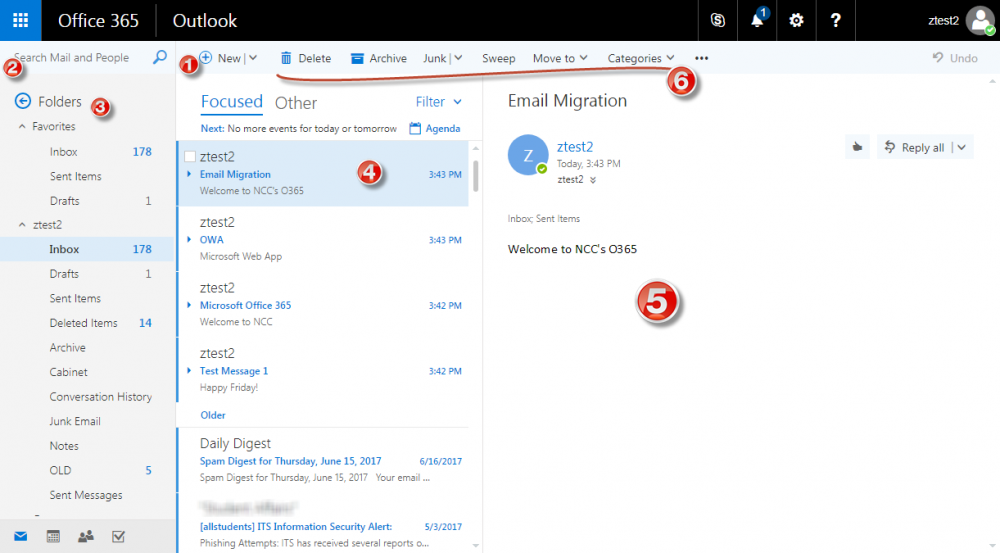
-
New: Create new messages by clicking the "New" button.
-
Search: You can type the name of a person from whom you want to find messages, or you can search for text to find content of a particular message.
-
Folder List: Navigate the folders in your mailbox and favorites.
• Create additional folder in the folder list.
• You can collapse this pane by clicking the folder heading at the top.
• Expand or collapse folders by clicking the triangle icon next to the folder name.
• Create new folders to help organize your messages
• Drag and drop messages into folders
-
Message List: View basic information about each message including sender, date, time, message status, and a brief synopsis of the message body.
-
Reading Pane: View the conversation you have selected from the message list. Respnd to any message in the conversation by clicking on the down arrow next to the "Reply All" and select your response type right from the reading pane.
-
Mailbox Management Tools: Use these tools to manage your mailbox. Delete, archive, file messages to folders, mark senders as SPAM and assign categories to messages.
Additional Resources:
Additional information about using mail features of your NCC Microsoft Office 365 account can be found on Microsoft's website.
Calendar
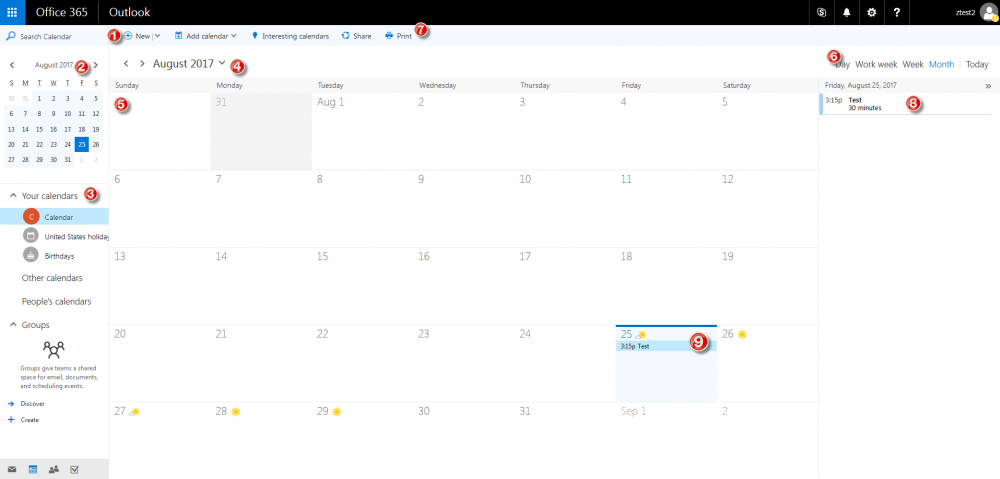
- Create a new event by clicking on the new event icon.An event can be an appointment, a meeting, or an all day event.
- Use the calendar to navigate from one date to another. Shading will show you what week you are currently viewing, and the darker shading marks the current date.
- You can view more than one calendar at a time. This section allows you to add other peoples calendars and select which one to display.
- This area allows you to navigate from one month to another. Click the left and right arrows to cycle through the months chronologically. You can also click on the down arrow next to the month to select a specific month.
- The main window is where the calendars are displayed.
- Select different views of the calendar.
- Share or Print the currently selected calendar
- Displays the agenda for the selected date
-
Shading indicated the current date.
Additional Resources:
Additional information about calendars can be found on Microsoft's website.
Contacts
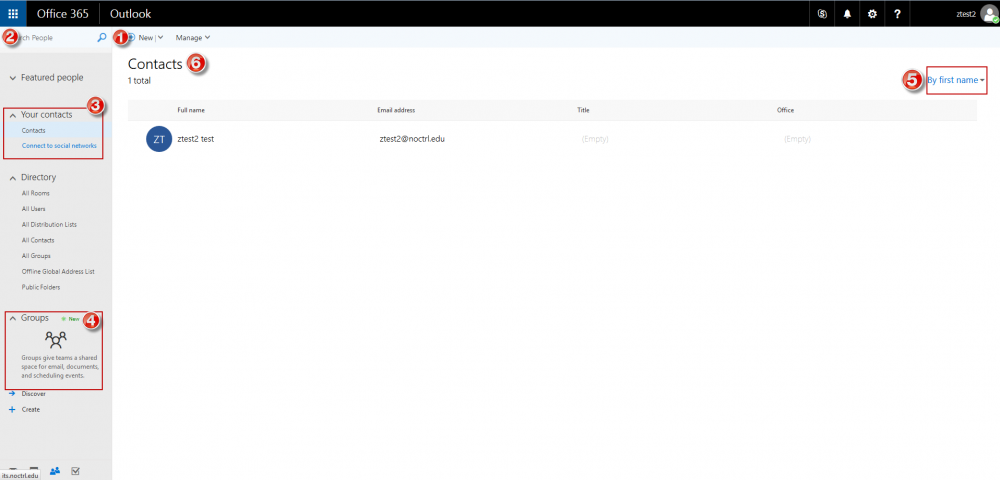
- New Contact: Create a new contact, contact list, or group by clicking on the new icon
- Search: The search area allows you to enter a person’s name to search for then in your contacts and in the North Central College address book.
- My Contacts: The section where you can locate all your contacts and contact lists
- Groups: Address book groups are listed here
- Sorting: Sort contacts in a list by first name or last name
- The selected list of contacts is listed here.
Additional Resources:
For more information about using Contacts, visit Microsoft's website at:
Managing Contacts in Outlook
Tasks
Outlook provides you with tools to create to-do lists using Tasks. This feature allow you to manage a variety of tasks, such as setting due dates, reminders, categories, and more.
Additional Resources:
Additional information about utilizing tasks can be found on Microsoft's website.
Configure Settings
Outlook Web App offers you the ability to configure many settings on your account. Please click on the links below to find out how to change the most popular settings.
You can access your mail settings by logging into your Office 365 account and clicking on the gear shaped icon an select "Mail."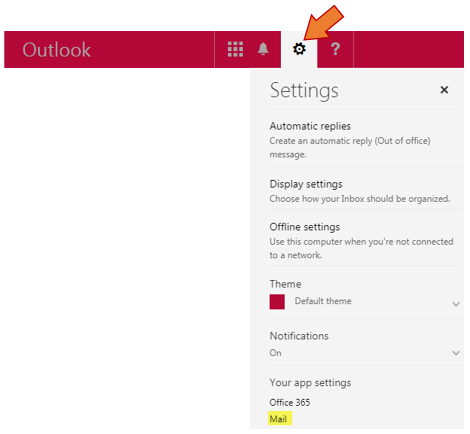
- Automatic Replies - Out of Office/Vacation Replies
- Email Signature
- Message Options
- Default Message Format Options
- Mark as Read options
- Read Receipts
- Managing Junk Email
- Message List Settings
- Reading pane options
- Conversation Options
Additional Resources:
Additional information about configuring mail settings on your NCC Microsoft Office 365 account can be found on Microsoft's website.